X-MAS CTF 2019 - Kernel Crackme (484pt)
windows kernel reversing
December 19, 2019
reversing
Kernel Crackme (484pt)
Reversing
Description: Leaked from a famous malware author this looks like some sort of testing device for a new obfuscation. Stop the hacker before he delivers his final product!
Update: The driver (.sys) is unsigned. You can only load it by disabling driver signature enforcement and enabling test mode. To load the driver you need to start the exe as admin. If you want to run this please do it on a virtual machine. (Author: avlad171)
Files:
Solution:
TLDR: The windows .exe loads a driver that operates a device on \\.\Crackme. The password is read in by the client and sent to the driver by writing to this file. The kernel runs a sort of hash function to produce a new stream of bytes that are sent back and compared against a static buffer.
For this challenge, we are provided with a Windows .exe and a .sys file which is a kernel driver. I’m mostly a mac/linux person so I don’t have a ton of experience with Windows internals and I though this would be a good learning experience.
Since we are dealing with a kernel driver, I wanted to set up a kernel debugging environment. I was able to set up two Windows 7 VM’s in VirtualBox: one as the target configured with kernel debugging and one as the host running WinDbg.
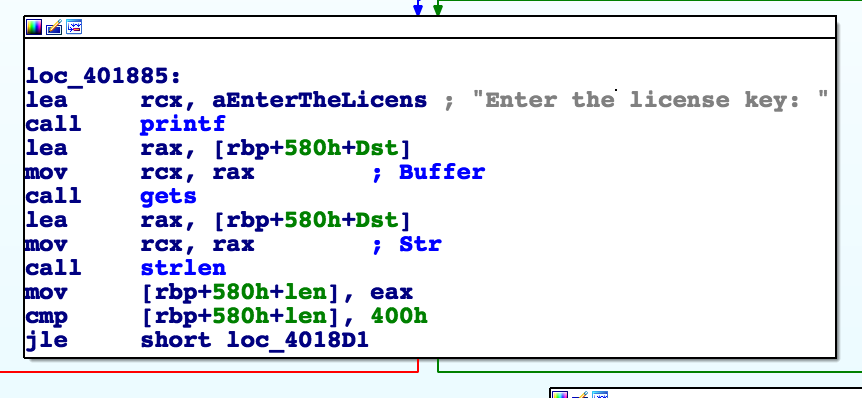
The Client
The .exe tries to load the driver and then asks for a license key and reads it into a buffer:
Then it communicates with the driver over \\.\Crackme by writing the license key and then reading the response:
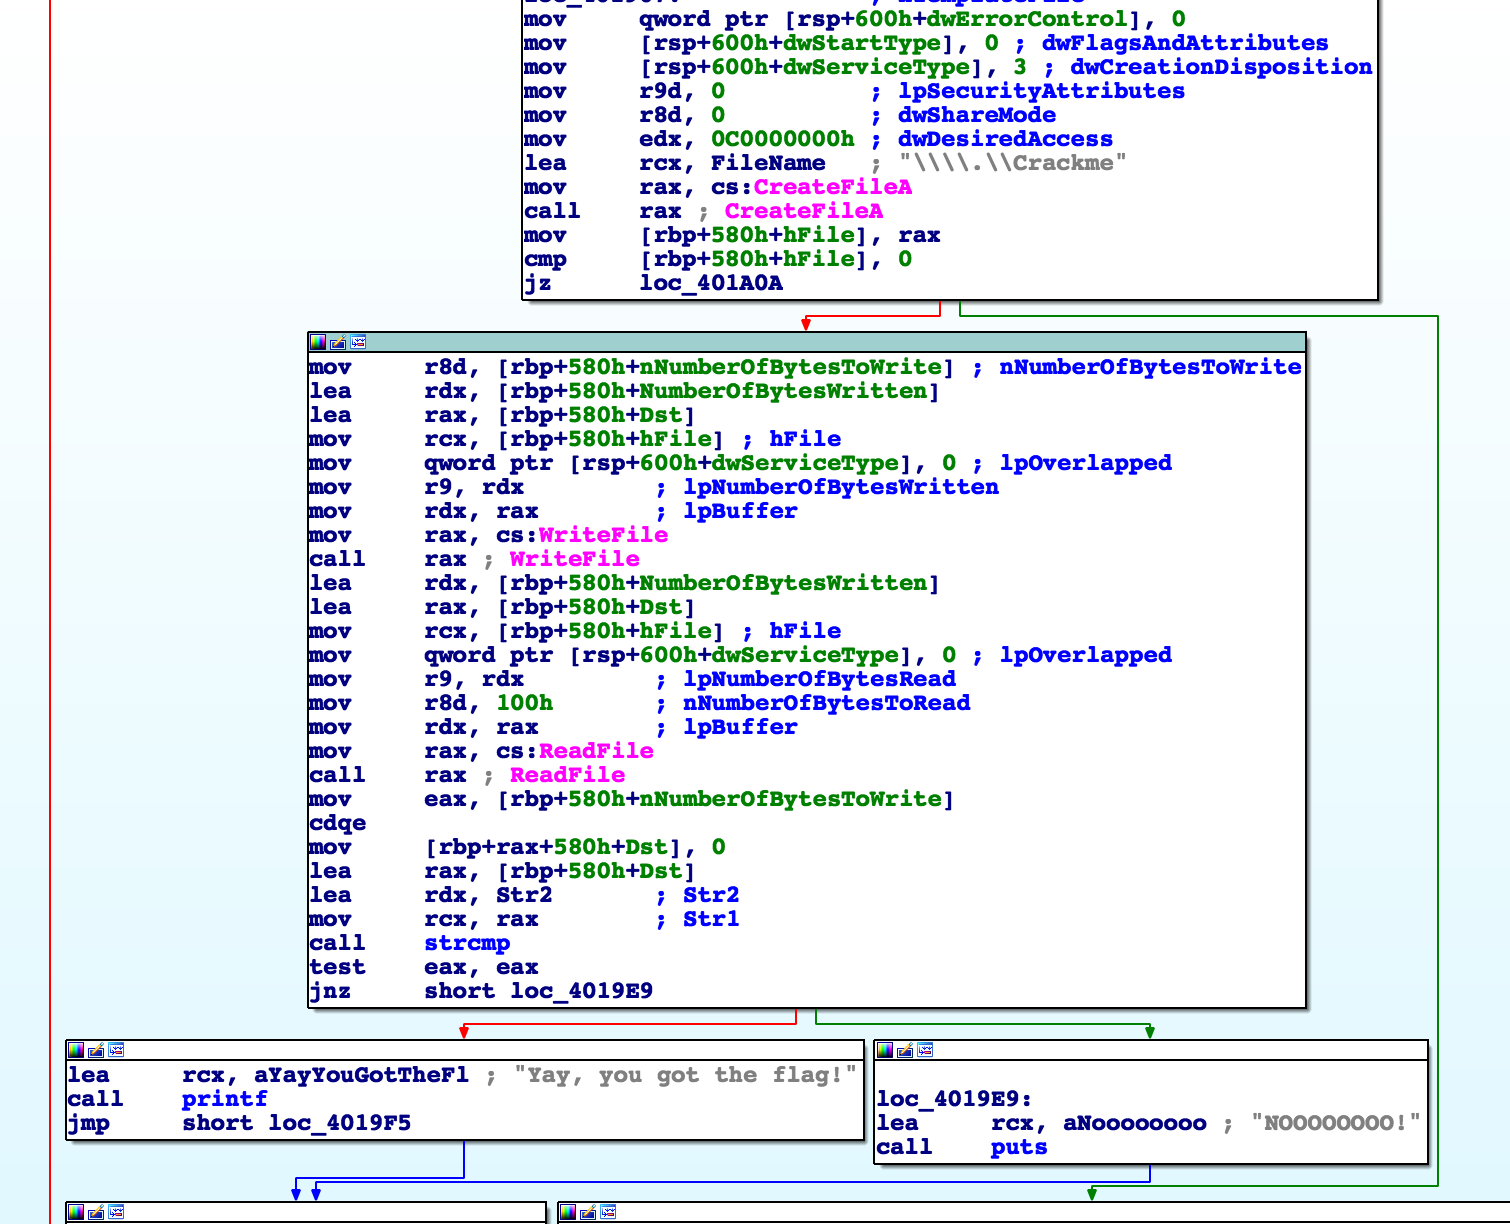
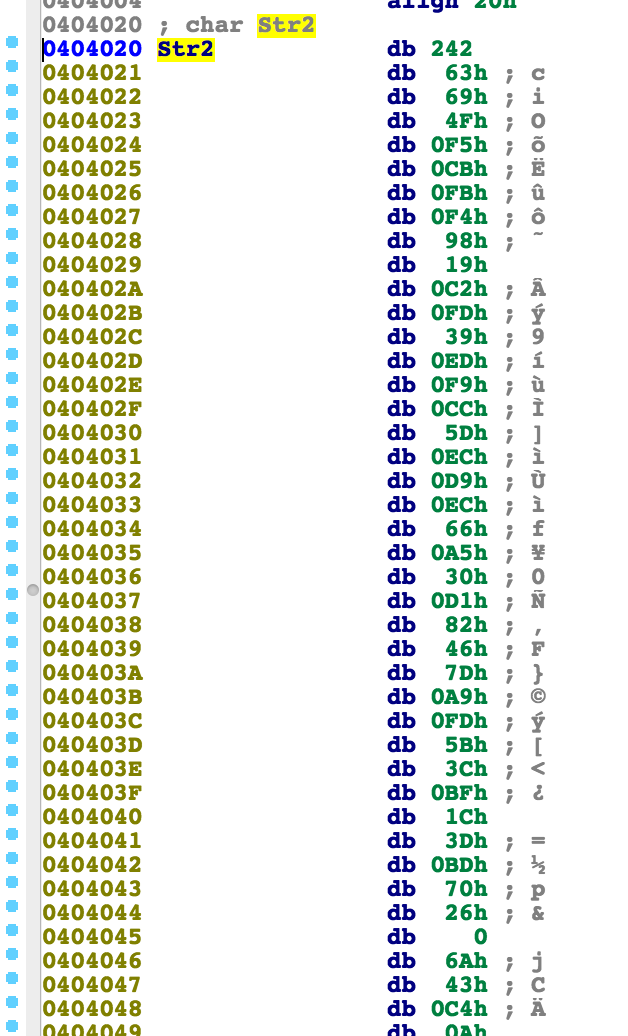
If the response matches the following static buffer, we have the correct flag:
The Driver
After examining the driver code, we see a function that registers \Device\Crackme and sets up an IRP disbatch table.
The two functions of interest are +0x1720 (read data), +0x15C0 (write data).
These functions are called to handle read and write requests (such as the ones the client will make).
I figured this out initially, by setting kernel breakpoints and watching which functions were triggered. However another sign is the use of ProbeForWrite and ProbeForRead which are functions that ensure a target buffer is in usermode space and correctly aligned.
So at this point, we know that the client will send some data (hopefully the flag) to the driver and the driver will then send back some processed data (via the client making a ReadFile request).
In order to solve this challenge, we need to figure out where and how the data is being processed.
Examining the driver write function, we see the following:
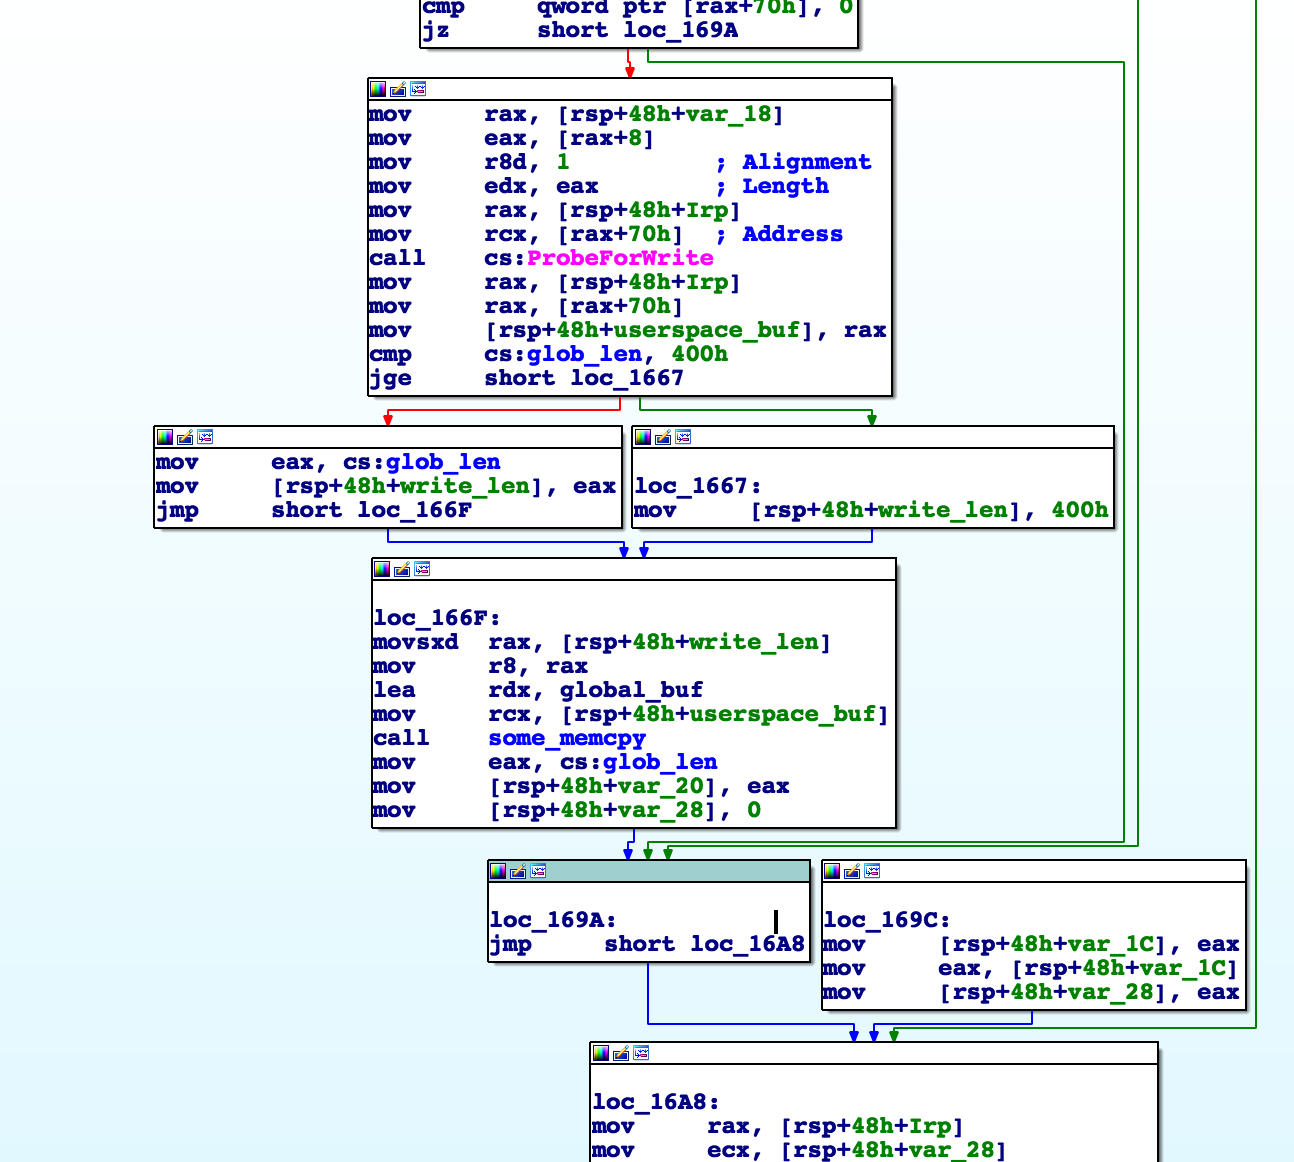
After the ProbeForWrite call, we see a global buffer being copied to a userspace buffer.
This buffer is not initialized to anything so it must be set prior to this call (i.e. in the driver read call).
As a side note, the memcpy routine here did not originally have symbols and looks fairly complex for something so simple. One pattern I’ve learned to recognize over time is “accelerated memcpy” functions where you have a pyramid of loops: (copy bytes) (copy words) (copy blocks with xmm registers) (copy words) (copy bytes).
So let’s find where this global buffer is initialized…
Looking at the driver read function, we see:
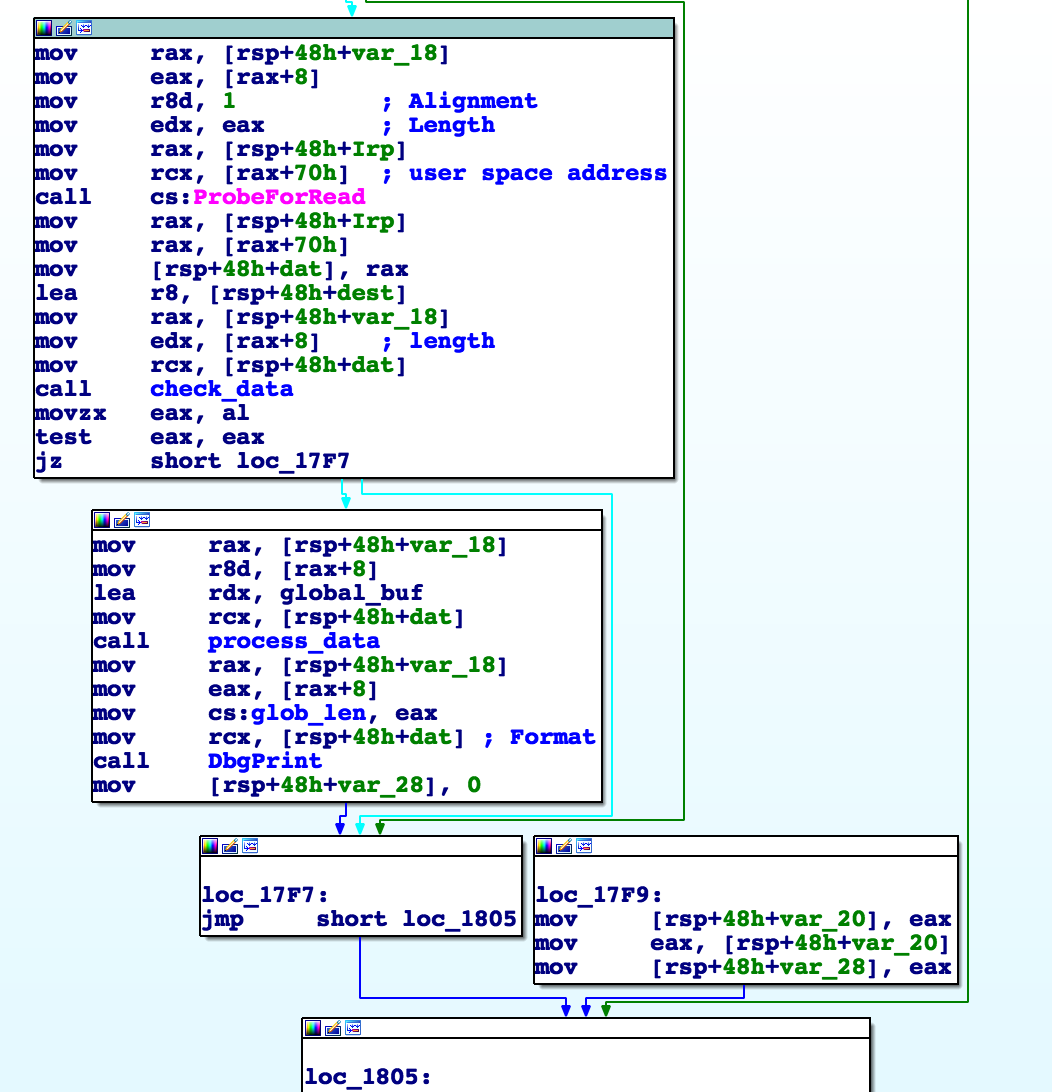
After the ProbeForRead it calls a check_data function and then optionally a process_data function.
The check_data function just ensures the input string is null terminated (which occurs if we type a number of bytes not divisible by 8).
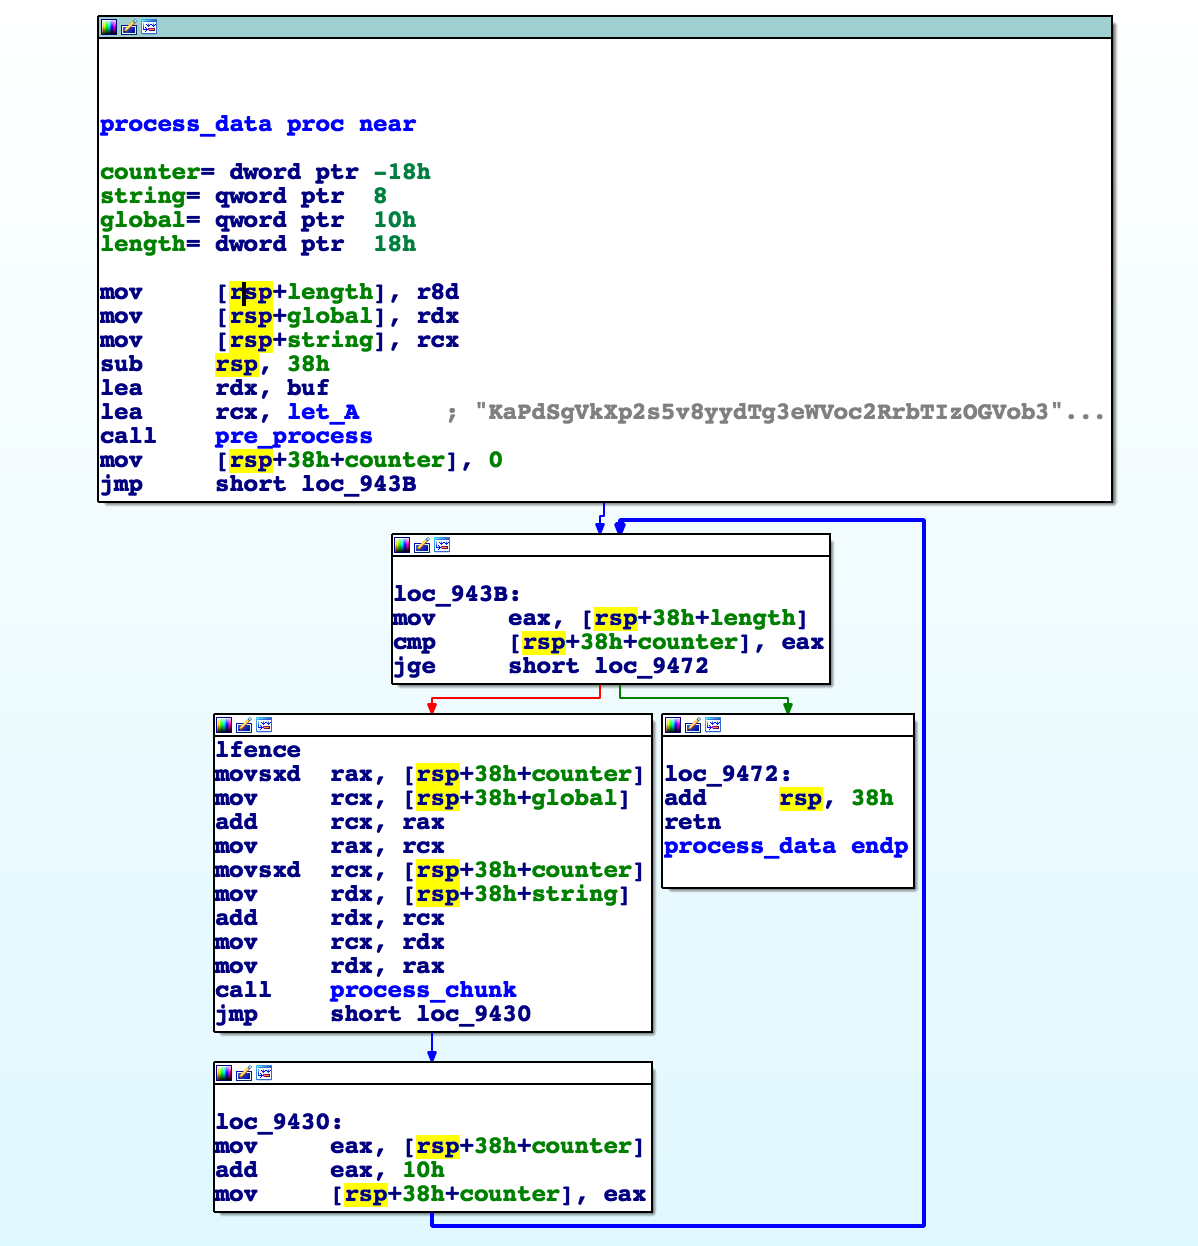
Then we finally see the function that initializes the new global buffer.
Inside this function, we see a deterministic pre_process function that we can ignore for now.
Then the flag data is processed in blocks of 0x10 bytes.
We can also see that the arguments to this function are the respective chunks of the string buffer and the global buffer.
So our global buffer will have a 1:1 correspondence with the input string.
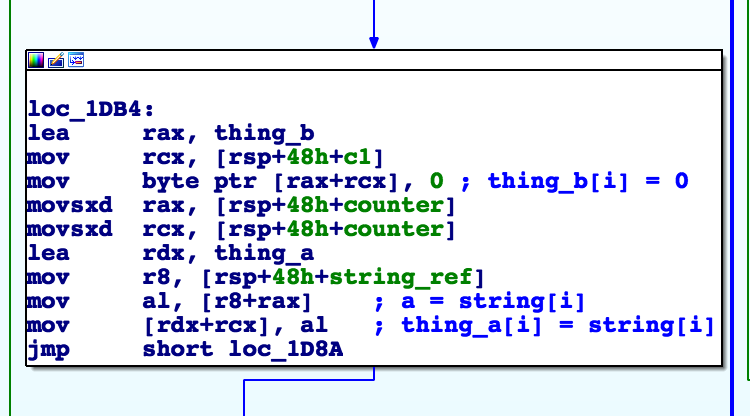
The process function operates on read/write buffers which I’ve labled: A and B.
First, we loop over the input block and clear B while setting A to the flag data:
Then we see some sneaky return pointer mangling to jump to a switch block in a loop:
At first this seems like a VM challenge, however we see that the order of the blocks that are executed is always the same. Essentially we have something like this:
char c = 0;

while (1) {
    switch (c) {
        case 0: {
            // ...
            c = 8;
        }
        case 8: {
            // ...
            c = 127;
        }
        case 127: {
            // ...
            c = 98;
        }
        // ...
    }
}
I started reversing these blocks by hand and after 12 blocks it repeats.
It repeats a total of 10 times and then the last block exits midway through.
Two more (read only) buffers are referenced that I’ve labled F1 and F2.
Additionally one block uses the pre-processed buffer (labled l2 below) as a lookup table.
I ran the binary and dynamically dumped this table since it is deterministic:
buf2 = '''
4b 61 50 64 53 67 56 6b 58 70 32 73 35 76 38 79
72 66 e6 f2 21 01 b0 99 79 71 82 ea 4c 07 ba 93
b5 92 3a db 94 93 8a 42 ed e2 08 a8 a1 e5 b2 3b
68 a5 d8 e9 fc 36 52 ab 11 d4 5a 03 b0 31 e8 38
a7 3e df 0e 5b 08 8d a5 4a dc d7 a6 fa ed 3f 9e
e2 4b d4 23 b9 43 59 86 f3 9f 8e 20 09 72 b1 be
82 83 7a 22 3b c0 23 a4 c8 5f ad 84 c1 2d 1c 3a
1a 1f fa 5a 21 df d9 fe e9 80 74 7a 28 ad 68 40
0f 5a f3 6e 2e 85 2a 90 c7 05 5e ea ef a8 36 aa
d6 5f 5f b1 f8 da 75 21 3f df 2b cb d0 77 1d 61
15 fb b0 c1 ed 21 c5 e0 d2 fe ee 2b 02 89 f3 4a
9c 61 c6 4d d3 18 30 c4 ae 5a 46 68 0b aa 8a 0b
'''.replace(' ','').replace('\n','')
buf2 = binascii.unhexlify(buf2)
buf2 = [ord(x) for x in buf2]
I implemented the process function in python to ensure I understood it:
def sim(A):
    B = [0] * 16

    for i in range(10):
        for j in range(16):
            A[j] ^= buf2[i*16+j]

        print(' '.join([hex(x) for x in A]))

        for j in range(16):
            A[j] = l2[A[j]]

        print(' '.join([hex(x) for x in A]))

        for j in range(16):
            B[j] = A[(j*5)&0xf]

        for j in range(16):
            A[j] = B[j]

        print(' '.join([hex(x) for x in A]))

        if i == 9:
            break

        for k in range(4):
            B[k*4] = f1[A[k*4]] ^ f2[A[k*4+1]] ^ A[k*4+2] ^ A[k*4+3]
            B[k*4+1] = A[k*4] ^ f1[A[k*4+1]] ^ f2[A[k*4+2]] ^ A[k*4+3]
            B[k*4+2] = A[k*4] ^ A[k*4+1] ^ f1[A[k*4+2]] ^ f2[A[k*4+3]]
            B[k*4+3] = f2[A[k*4]] ^ A[k*4+1] ^ A[k*4+2] ^ f1[A[k*4+3]]

        print(' '.join([hex(x) for x in B]))

        for j in range(16):
            A[j] = B[j]

    for j in range(16):
        A[j] ^= buf2[0xa0+j]

    return A
Most of this processing is easy to reverse except the last chunk that uses F1 and F2.
A naive brute force would search 32 bits so I wrote a solver with z3:
def crack_partial(b):
    s = Solver()

    F1 = Array('f1', BitVecSort(8), BitVecSort(8))
    F2 = Array('f2', BitVecSort(8), BitVecSort(8))

    for i in range(256):
        s.add(F1[i] == f1[i])
        s.add(F2[i] == f2[i])

    a = [BitVec('a%d' % d, 8) for d in range(4)]

    s.add(F1[a[0]] ^ F2[a[1]] ^ a[2] ^ a[3] == b[0])
    s.add(a[0] ^ F1[a[1]] ^ F2[a[2]] ^ a[3] == b[1])
    s.add(a[0] ^ a[1] ^ F1[a[2]] ^ F2[a[3]] == b[2])
    s.add(F2[a[0]] ^ a[1] ^ a[2] ^ F1[a[3]] == b[3])

    s.check()
    m = s.model()

    return [m[a[i]].as_long() for i in range(4)]
At this point you simply reverse each chunk of the target string and obtain:
X-MAS{060b192f0063cc9ab6361c2329687506f50321d8}